

Guide to Web Scraping with BeautifulSoup
How Does Web Scraping Work?
Web scraping a web page means requesting specific data from a target web page. When scraping a page, the code you write sends a request to the server hosting the target page. Then the code loads the page, extracting only those page elements that were originally defined in the scraping job.
For example, suppose we need data in H3 heading tags. We will write parser code that looks for exactly that information. The parser's work will consist of three steps:
- Step 1. Send a request to the server to load the site content.
- Step 2. Filter the HTML page to find the desired H3 tags.
- Step 3. Copy the text inside the target tags, obtaining the result in a format previously specified in the code.
Web scraping tasks can be solved in many programming languages using different libraries, but using Python with the Beautiful Soup library is one of the most popular and efficient methods. In the following sections, we will cover the basics of scraping in Python using Beautiful Soup.

What is Beautiful Soup?
Beautiful Soup provides simple methods for navigating, searching, and modifying the parse tree in HTML and XML files. It converts a complex HTML document into a tree of Python objects. Additionally, it automatically converts the document to Unicode so you don't have to worry about encodings. This tool helps not only with scraping but also with data cleaning. Beautiful Soup supports the HTML parser included in the Python standard library, but it also supports several third-party Python parsers such as lxml or html5lib.
Installing Requests and Beautiful Soup
To install Beautiful Soup, you will need pip or any other Python installer. You can also use your Jupyter lab. In this post, we will use pip as it is the most convenient. Open a terminal or Jupyter Lab and type: Command line syntax for pip install beautifulsoup4 for Beautiful Soup libraries in Python.



Simple Steps for Scraping in Python with Requests and Beautiful Soup
Step 1: You need to send an HTTP request to the server of the page you want to scrape. In response, the server sends the HTML content of the web page. Since we are using Python to send requests, we need a third-party HTTP library, and we will use Requests.
Let's start by importing the Requests library and making a simple GET request to a URL - we chose https://www.brainyquote.com/topics/motivational-quotes because it has a simple HTML structure and allows us to easily demonstrate.

If you get a [200] response, it means the site responded with HTTP 200 OK and sent us the HTML content of the page.
Let's perform the same request again, but this time save the result in a variable r and print its content.
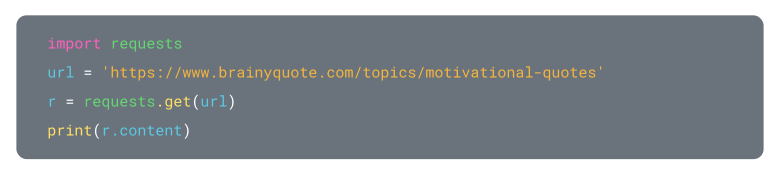
The output should be the entire HTML code of that page. As you can see, it is unstructured, and Beautiful Soup will help us clean it and get the data we need.
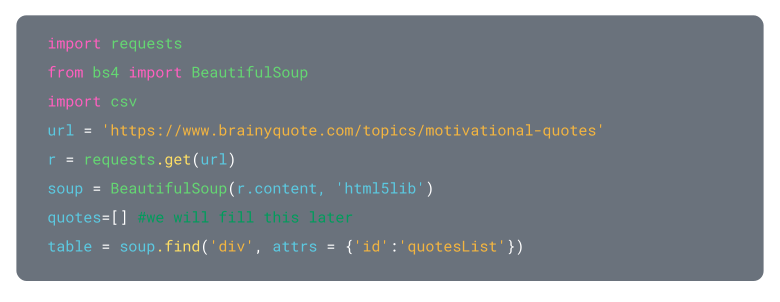
Step 2: Now that we have the HTML content, we need to parse the data. To do this, we will use Beautiful Soup with the html5lib parser.

We need to pass two values to BeautifulSoup():
#1: The HTML string from the site; 'r.content'
#2: Which HTML parser to use; 'html5lib'
Step 3: At this point, we need to go to the site being scraped. Open Devtools (F12) and go to the Elements tab. We will look for the top layer of the table.
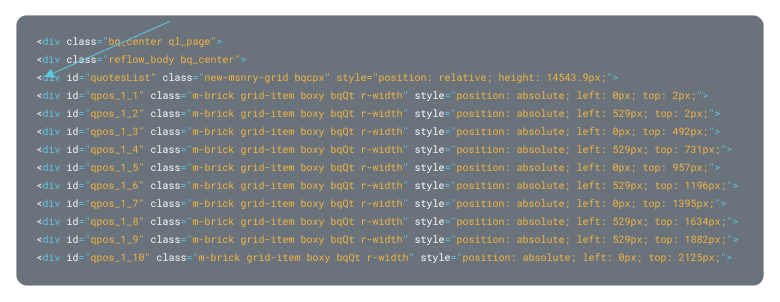

Let's display the table to better understand what we have so far, and use the .prettify() function.

Your result should look something like this:
Now we look for the data we need. In this example, we only need the quoted text and the author's name. As you can see, all this data is located at
So let's iterate through all instances of this class and get all the quotes in our table.

Now you should have access only to
in each loop instance. You can verify this by doing print(row) inside the loop.
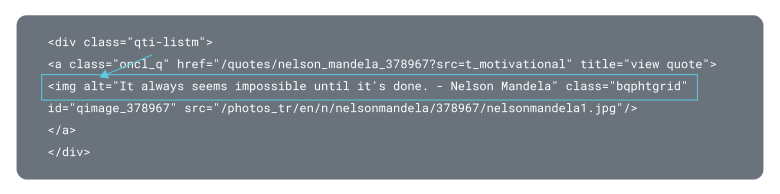
We are looking for information by the key "img alt", so we create a variable quote and assign it this data.
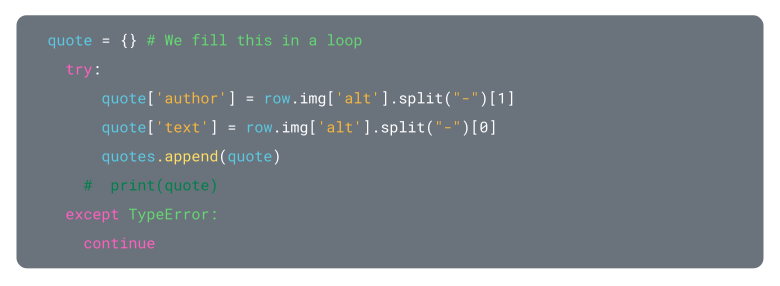
As you can see, we wrapped it in a 'try' statement. In this case, if one of the rows does not contain the desired data, no error will occur, and the loop will continue. We also split the results by '-'. As you saw earlier, the text and author name are separated by a '-'. Let's use this to split the two and separate them.

That's it, you're done. Here is how your quotes variable should now look:
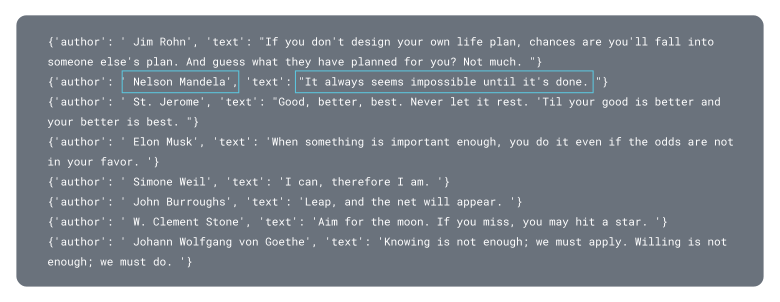
At the end of this process, you can save the data in a file, and your code should look something like this: